
Are you looking to bring vibrant colour and elegance to your garden? Grow camellias! These evergreen shrubs that bloom in gorgeous red, pink, or white shades stand for faithfulness and longevity floral symbolism-wise. Depending on the classification, camellias produce large, delicately ruffled flowers from late fall to mid-spring. Camellia flowers make a lush addition to wedding arrangements. Adorned with the ‘backdrop’ of year-round glossy dark green leaves, the plant is a charming decoration for any garden.
Planting camellias in the fall is the best solution. The plant will thrive in the post-summer warmth of the soil, with its roots having lots of time to settle before the cold months arrive. Pick the least windy spot in your garden where the shrub won’t be exposed to direct morning sunlight. Otherwise, it can destroy the blooms in the blink of an eye. As an alternative, you can plant the shrub in a pot in spring. Just make sure you pick the colour that tickles your fancy.
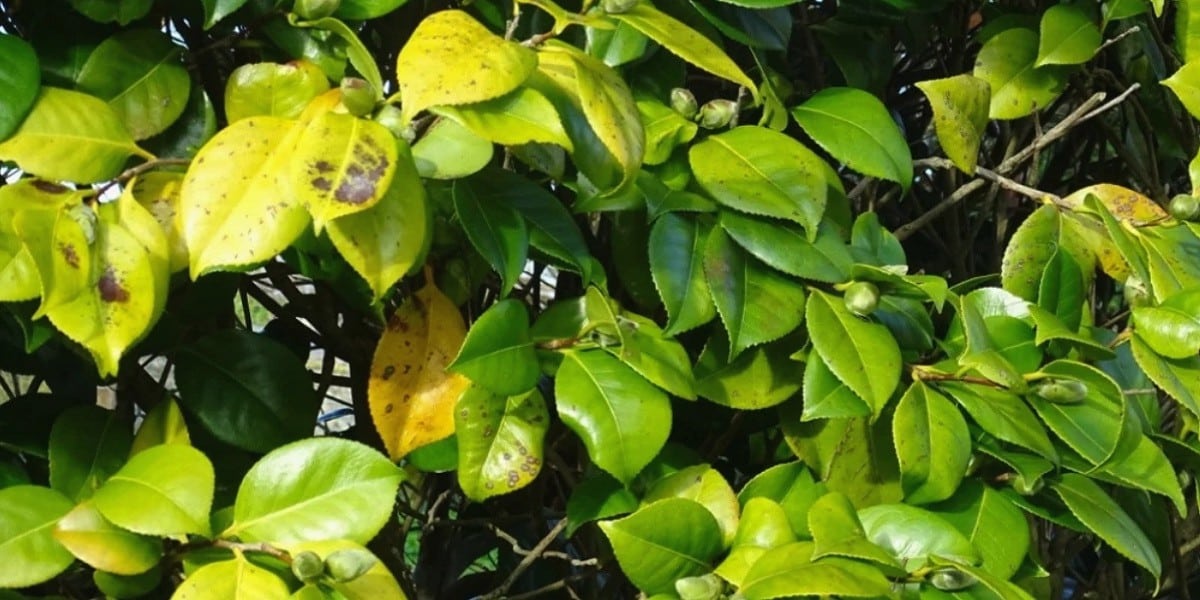
Although this plant is rather undemanding, it’s natural that it’s not resistant to various ‘health hazards’ and conditions, such as yellow leaves on a camellia bush. So, if you’re well aware of the basics of proper care and disease cycle control, your chances of immediate problem identification and fast treatment get a significant boost.
Your camellia foliage may be subjected to discolouration for a number of reasons. Improper watering and high soil pH are among the main reasons why the plant’s leaves may start yellowing. In this piece, we’ll delve deep into the factors behind these ‘whys’, and cover the best solutions and natural treatment options, as well as effective prevention strategies. Stay tuned and remember to bookmark this post for further updates on plant diseases.
Camellia Leaves Turning Yellow: Why?
Camellias are stunning, that’s a fact. However, just like other delicate plants, this shrub occasionally suffers from a variety of diseases. Some of the most typical issues are attributable to improper growing conditions, rodent activity, and a multitude of camellia diseases. To determine the exact reason why your plant’s foliage decolours, you’ll need to take a closer look at the affected parts and compare the symptoms described below with what you see. So, without further ado, let’s get the tell-tale sign and reason explanation going.
1. Excessive watering can lead to the yellowing of your camellia foliage. If you overflood your evergreen shrubs, their soil will, naturally, stay damp long-term. As a result, the roots of the plant will get waterlogged. This, in its turn, will make them squashy and abnormally soft. As a consequence, they will lose the ability to absorb water and minerals, which is going to deprive the plant of its healthy regime and cause yellow leaf disease. Although it’s not the only reason why the leaves of your sophisticated shrub may become yellow, ensuring that your watering rituals are correct is a must. Empower yourself with knowledge when it comes to each and every step of your camellia care.
How to solve:
- test the soil for dryness prior to watering your camellias: is the top-inch level absolutely dry? Then it’s drinking time for your precious plant!
- stick to a weekly watering schedule instead of daily shallow watering: the only exception here is prolonged rain.
2. Soil issues may also cause yellowing foliage in certain camellia types. The pH is a measure of the acidity and alkalinity in soils. The lower its levels, the higher the soil’s acidity. While a high pH level means high alkalinity. The former situation adds up to nutrient absorption, which means acidic soil is best for your camellias. In case you’re dealing with inappropriate pH levels, your shrub’s new leaves will grow yellow, while older leaves will retain their deep green-ness. The healthiest pH level moves around 6.0. In case your soil is clayey and fails to drain well, opt for containers. With that said, you’re going to need to purchase a soil testing kit and run the soil through its paces prior to using it for growing camellias.
Wondering if you can alter the pH by incorporating minerals? Yes, but this natural remedy is time-consuming. If you want to solve the problem as soon as possible, you’re going to need to look for alternative methods. For instance, you can prepare new soil with the required pH levels and relocate your precious shrub into it. Facing difficulties digging the baby out? Utilize an iron mix powder and don’t forget to follow the manufacturer’s guidelines.
How to solve:
- if your soil pH is 6.5 and higher, sulfur and/or organic material will help;
- in case of soil with high acidity (pH lower than 6.0), utilize limestone power for effective neutralization.
3. Ever-hungry and annoying critters may latch onto your shrubs and suck healthy minerals out of them. This can leave your camellia foliage yellow, too. In this case, you’ll easily notice the symptom, for it will show yellow areas of various sizes on your plant’s leaves. If you look beneath the foliage, you’ll notice tiny spiderwebs and insects spread all over them. Fortunately, this stuff is easy to remove, along with the pests like tea scale that munches on your gorgeous camellia’s vitality. In this case, the leaves will look yellow on the surface, with white and fuzzy sections underneath. The damaged foliage won’t recover. But chances are the emerging leaves will look all shiny and new — unless they get affected by another condition or bacteria.
How to solve:
- utilize a reliable insecticide on your magnificent shrubs;
- get a quality neem oil, mix it with water and get the spraying going all over the damaged spots;
- dab isopropyl alcohol onto the affected areas.
4. Foliage yellowing in camellias can also be caused by an array of plant diseases. If gardening is your hobby, then you’re probably aware of the fungal diseases that can terrorize your beautiful blossoms and feed on their foliage juices. These ailments are easy to pinpoint, as the yellowing it leads to also shows black spots, along with white or green mould attacking the surface of the shrub’s foliage. Although this issue can be fixed, the damaged leaves will not recover. Therefore, pruning and thinning out your affected camellia foliage would be a nice and fast (yet not the only) solution.
How (else) to solve:
- slay the mould by spraying the damaged foliage spots with a solid fungicide that contains copper;
- get the pruning going: just make sure you don’t thin out the houseplant too much and pray that further disease transmission has been stopped. All in all, nothing is irreversible when it comes to your favourite plant’s foliage turning yellow.
5. Insufficient watering and low-quality soil can leave your outdoor or indoor plant with yellowing leaves. If your camellia soil is too clayey, this will prevent the moisture from soaking into its depths and reaching the roots. With that said, opting for quality soil and following a strict watering schedule is a must when it comes to taking good care of your charming evergreens. Yes, it requires heaps of time and effort, but you are bound to succeed.
How to solve:
- water the top inch of the soil;
- relocate the plant into a compost-filled hole;
- fertilize the soil to boost its quality.
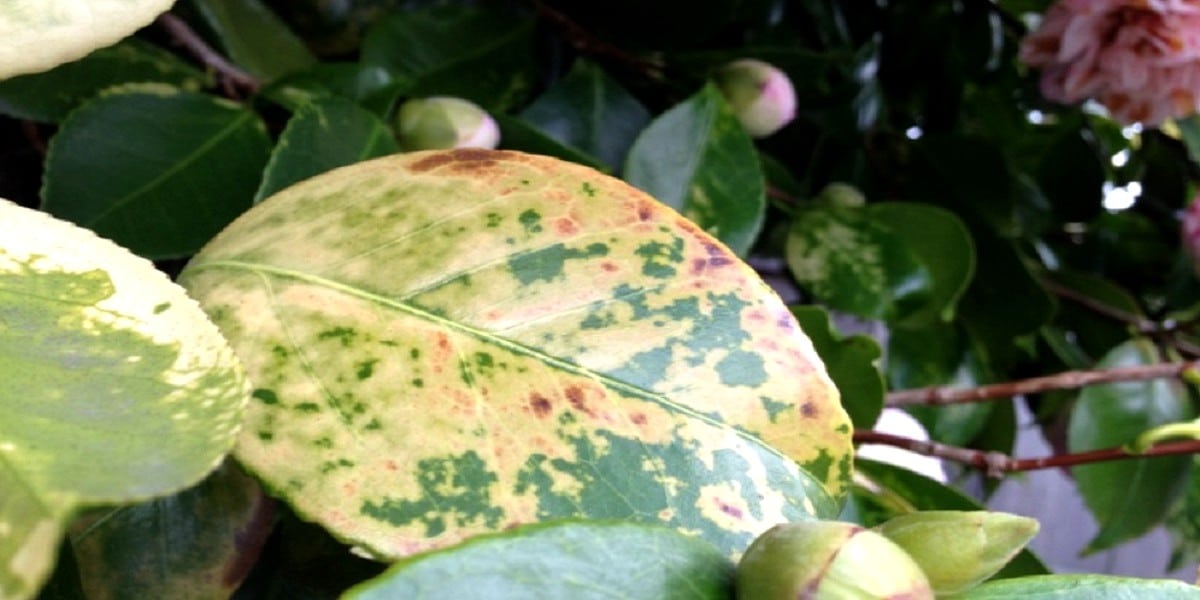
6. Insufficient or excessive fertilization can also create the yellow-foliage problem in your camellia shrubs. This type of yellowing comes with distinct symptoms i.e., the leaves will turn yellow while their veins will remain green. This condition reflects the insufficient absorption of healthy minerals and is known as chlorosis. The opposite form with similar tell-tale signs is excessive fertilization. In the long run, only an in-depth analysis of your maintenance regime will show whether you’re under- or over-feeding your babies with healthy nutrients.
How to solve:
- utilize a top-level potassium-rich fertilizer designed specifically for your type of shrubs and don’t forget to heed to the manufacturer’s guidelines;
- turn to a nitrogen fertilizer during spring to preserve your camellia’s leaves luscious green colour;
- keep tabs on the freshly appearing leaves: if the yellowing subsides, your fertilizing approach is correct.
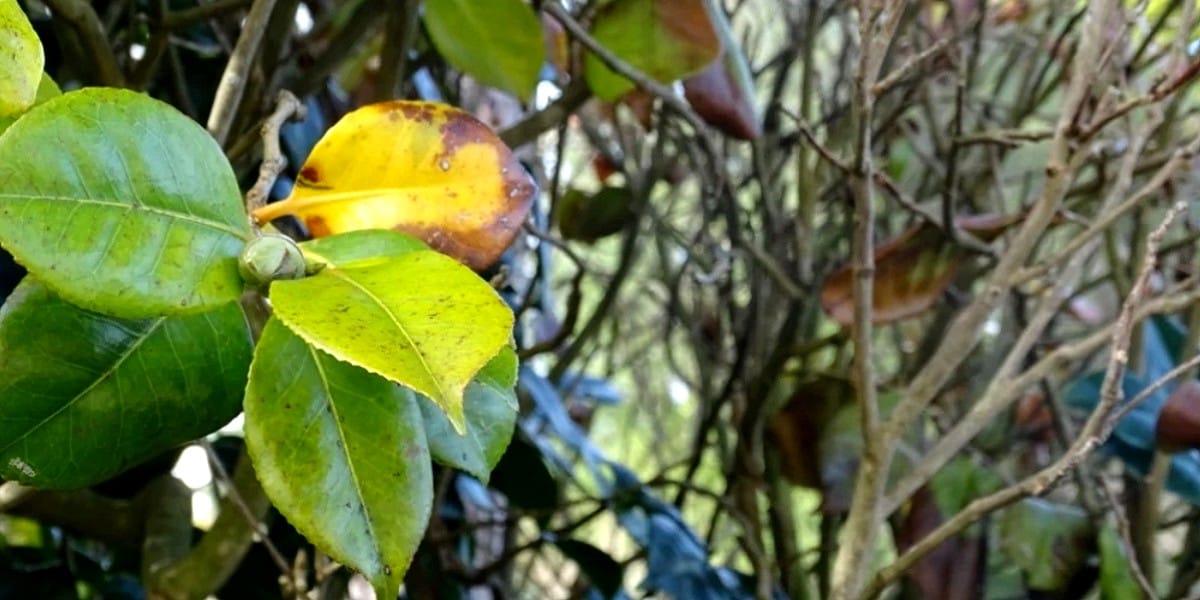
Another reason why your camellia leaves may turn yellow or brownish is cold winter winds. To prevent this from happening, make sure the soil is moist when the weather is dry and protect your precious plant from serious drought and cold wind. Similarly, the foliage of your camellias may turn yellow due to the excessive heat they are exposed to. This won’t kill the entire plant but the damaged leaves are most likely to fall off.
Important note: despite being evergreen plants, camellias do shed their old foliage on a regular basis. Furthermore, camellia leaves may start yellowing naturally in spring or summer as the old foliage is replaced with new growth. Also, random yellow blotches on your shrub’s leaves may be caused by a virus infection.
Tips to Prevent Camellia Foliage Yellowing
Prevention is the best cure, we all know that. In order to prevent your plant’s foliage from yellowing, you’re going to need to focus on proper camellia care. This task is not too overwhelming, especially if gardening is what you really love. First and foremost, plant the shrub in partial shade (direct sunlight in the morning, shady area in the afternoon). Make sure the soil you utilize is high-quality and avoid planting the shrub too deep.
With regard to watering practices, remember one thing: these shrubs fancy a nice shower (and drink, too!). So, quench your precious blossomy plant’s thirst on a regular basis when it’s hot outside. If the soil feels dry up to three inches deep, watering is essential. If you planted in the fall, once-every-two-weeks of watering is the golden rule during the non-rainy periods. If you planted in spring, weekly watering is sufficient for the first several weeks. After that, water every other week.
Another disease prevention method comes down to regular pruning. Camellias are tall shrubs that require pruning to allow light and air to flow. Shape your lovely plant by pruning them. This procedure should be held when the cold months are gone, preferably in the spring when the blooms have fallen. Bear in mind that if you prune during the wrong period, you’ll severely damage the plant’s blooming potential. Cut off no more than one-third of the shrub within one session.
Moving on to the next way to prevent your camellias from yellowing leaves. Two words: proper fertilization. Camellias are acid-loving shrubs. So, in order for the evergreens to thrive, you’re going to work on providing the soil with the needed nutrients and maintaining proper pH levels. 5.5 to 6.5 are the numbers worth concentrating on. If you fail to plant your camellia in appropriate soil, the shrub will have difficulties absorbing fertilizer.
Last but not least, you will prevent camellia diseases if you watch out for their symptoms on a regular basis. Never stop learning about camellia care to make a positive change and elevate the results of your work to the next level.
Cutting to the Chase: Take Action ASAP
Camellias are loved by so many gardeners. They come in a treasure trove of shades and hybrids that you’ll always succeed in picking the right type for you. After planting these gorgeous shrubs in your yard, ensuring that they live a healthy life is paramount. Love and passion are key here. If you love your garden growth, you’ll find a way to make it thrive.
Prevention is the best cure, we all know that. In order to prevent your camellia foliage from turning yellow and brown, make the most of the knowledge you’ve gained in this post. Proper pruning and maintenance will also contribute to your evergreens growing healthy and strong. So, if your camellia foliage turns yellow instead of being a lush, healthy green, it’s time to switch from theory to practice and take serious, decisive action. With sufficient and smart nutrition, moderate pruning, and effective pest control, your camellia growing endeavour is bound to succeed.
Leave a Reply
You must be logged in to post a comment.