

Plover Eggs Plant Care (Adromischus cooperi)

Also known as: Plover Eggs
Plover Eggs Plant

About Plover Eggs Plant

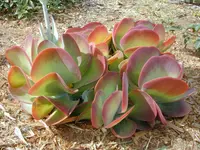
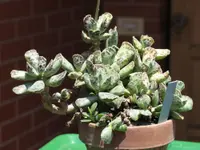
Plover eggs plant, Adromischus cooperi, is a compact, slow-growing succulent from South Africa. It forms low clusters of short, thick leaves with mottled spots that resemble bird eggs. Leaves store water, which helps the plant tolerate short dry periods and makes it suitable for small pots and indoor displays. It stays relatively small and does not need frequent repotting. Adromischus cooperi prefers bright, indirect light, very well-draining soil, and careful watering that avoids prolonged wetness. With these conditions, it is generally considered an easy species for those learning how to care for Plover Eggs Plant.

Main Plant Requirements

Care Difficulty

Easy Care

Light Preference

Bright Indirect Light

Water Requirements

Low Water

Temperature Preference

Tropical / Frost Sensitive

Hardiness Zone

10–11

Soil Texture

Sandy, Loamy, Rocky

Soil pH

Slightly acidic (6.5–7.0), Neutral (7.0)

Soil Drainage

Well-drained

Fertilization

Minimal (feed rarely)

Get Personalized Care Plan

Scan your plant to receive care tips personalized for your specific plant

Available on iOS and Android

How to Care for the Plover Eggs Plant

This compact succulent prefers bright, gentle light that mimics its native habitat.

  • Provide 4–6 hours of bright light daily, ideally with morning sun and afternoon bright shade to protect the patterned leaves of the Plover Eggs Plant from scorch.
  • Outdoors, place in light dappled shade or eastern exposure; indoors, keep near an east or bright north window with only brief direct sun.
  • Watch foliage color and shape: elongated, pale, or leaning growth indicates too little light, while brown, crispy patches suggest excessive direct midday sun.

This species stores water in its leaves and prefers a thorough but infrequent watering approach.

  • Allow the top 3–5 cm of soil to dry completely before watering; in warm active growth, this may mean watering every 10–21 days depending on light and airflow.
  • In winter or cool low-light periods, extend intervals significantly and water only enough to prevent wrinkling or soft, folding leaves, which signal mild thirst.
  • Use a very fast-draining gritty mix and a pot with drainage holes to prevent root rot; yellowing, translucent, or mushy leaves indicate overwatering, while brittle shriveled leaves suggest prolonged drought.

This succulent prefers warm, dry conditions with mild seasonal variation.

  • Aim for 65–80°F (18–27°C) during the growing season for best growth; short peaks up to about 90°F (32°C) are tolerated if airflow is good and soil is not constantly wet.
  • Protect from cold; growth slows below 55°F (13°C), and damage occurs near 40°F (4°C), with freezing temperatures likely to kill roots and leaves.
  • Over winter, a cooler but frost-free range around 50–60°F (10–16°C) can be beneficial, provided the plant is kept much drier and sheltered from cold drafts or sudden temperature drops.

This species prefers dry indoor air and does not have special humidity requirements.

This succulent needs a very fast-draining, mineral-rich mix to prevent root rot.

  • Use a gritty mix such as 50–70% inorganic components (pumice, coarse sand, or small gravel) blended with cactus potting mix.
  • Aim for slightly acidic to neutral pH, around 6.0–7.0, which supports nutrient availability and root health.
  • Increase aeration by using large particle sizes (3–6 mm) and avoiding fine peat that compacts and holds excess water.
  • Avoid dense, moisture-retentive garden soil or mixes heavy in peat or coco coir, which keep roots wet for too long.

This compact succulent is very suitable for container growing.

  • Choose a shallow but wide pot to match its relatively shallow roots and allow room for offset clusters to spread.
  • Select unglazed terracotta if extra evaporation is needed, or glazed ceramic in very dry homes to slow moisture loss.
  • Stabilize lightweight pots with a top dressing of gravel so a crowded Plover Eggs Plant does not tip as it becomes heavier.

Adromischus cooperi needs modest feeding to maintain compact, healthy growth in containers.

  • Use a balanced liquid succulent fertilizer (around 10-10-10 or 20-20-20) diluted to 25–50% strength.
  • Feed every 4–6 weeks during spring–summer while growth is active.
  • Stop feeding in fall–winter when growth slows, as the Plover Eggs Plant rests.
  • Avoid organic compost or heavy slow-release pellets that keep the soil wet or salty.

Adromischus cooperi requires only light pruning to stay tidy and disease free.

  • Best time is late winter to early spring, before strong new growth begins.
  • Snip off dead, shriveled, or damaged leaves with clean, sharp scissors or snips.
  • Remove stretched, leggy stems to encourage a compact, bushier shape.
  • Discard any rotting parts promptly to reduce fungal problems and improve airflow.

Container-grown plants benefit from infrequent but careful repotting to refresh the soil and check root health.

  • Repot every 2–3 years, or when roots circle the pot base or emerge from drainage holes.
  • Choose late spring as the ideal time, when growth is starting and temperatures are stable.
  • Use a shallow pot with excellent drainage and a gritty cactus–succulent mix.
  • Handle roots gently, keep them slightly dry for a few days after repotting, and resume light watering once any damage has callused.

This species is commonly multiplied from leaf or stem cuttings rather than seed.

  • Take healthy leaf or short stem cuttings in late spring or early summer.
  • Allow cut surfaces to dry and callus for 2–3 days in a shaded, airy place.
  • Place cuttings on or just in a barely moist, gritty succulent mix with bright, indirect light.
  • Keep temperatures around 68–75°F and avoid overwatering until firm roots form.

This succulent is not frost hardy and needs indoor or protected conditions in cold climates.

  • Bring containers indoors before temperatures drop below 40°F, choosing a bright, cool window.
  • Maintain 50–60°F in winter with low to moderate watering, letting soil dry fully between waterings.
  • Provide good airflow and avoid cold drafts or contact with cold window glass.
  • Keep the plant dry if outdoor lows may approach freezing to reduce risk of tissue damage.

Care Tips

Rotate For Symmetry

Turn the pot 90° every 2–3 weeks so the rosettes develop evenly and do not lean or stretch toward a single light source, which keeps the leaf markings more uniform.

Compact Growth Control

If stems start to elongate, lightly pinch off the soft growing tips with clean fingers or scissors; this slows vertical growth and encourages tighter, fuller clumps over time.

Targeted Debris Removal

Use a soft artist’s brush or a hand air blower to remove dust and old dried leaves from between the rosettes so moisture and pests do not accumulate in hidden crevices.

Prevent Water Pooling

After watering, gently tilt the pot and, if needed, wick out trapped water from leaf axils with the corner of a paper towel to avoid rot in the tight rosette center.

Seasonal Light Adjustment

Move the plant slightly farther from the window or give it sheer curtain protection in midsummer, then return it closer to the glass in winter to maintain compact, well-colored foliage when growing Plover Eggs Plant.

Common Pests and Diseases

Mealybugs

This pest feeds on leaf and stem sap, often hiding in the tight leaf clusters and at the base of the wrinkled leaves. Symptoms include white cottony tufts, sticky honeydew, and gradual leaf yellowing or collapse.

Solution

Isolate the plant, then dab visible mealybugs with cotton swabs dipped in 70% isopropyl alcohol and repeat weekly until no new insects appear. Improve light and airflow, avoid excess fertilizer, and use a ready-to-use insecticidal soap or neem oil spray directed into leaf crevices if the infestation is more extensive.

Aloe mite (eriophyid mite)

This pest can cause distorted, blistered, or tumor-like growths near the leaf margins and tips, sometimes with rough or corky patches. Symptoms include abnormal swelling that does not resemble normal aging or mechanical damage.

Solution

Remove and discard all affected leaves and dispose of them in the trash rather than composting. Keep the plant in bright, dry conditions, quarantine it from other succulents, and if new galls keep forming, consider discarding the most affected plants to prevent spread to a wider collection.

Soft scale

These insects appear as small, rounded or oval bumps along the stems and leaf bases, often tan, brown, or gray. This pest produces sticky honeydew that can attract sooty mold and ants, leading to stressed, dull-looking plants.

Solution

Gently scrape or rub off individual scales with a fingernail or cotton pad and wipe stems with a cloth lightly moistened with 70% isopropyl alcohol. Follow up by spraying a thin film of horticultural oil or neem oil over stems and leaf bases every 7–10 days for several cycles, ensuring the soil is protected to avoid over-saturation.

Fungal leaf spots

This disease produces small sunken brown, gray, or black spots on the fleshy leaves, sometimes with a darker edge. Symptoms include slow expansion of spots, tissue collapse in severe cases, and scarring that remains even after the infection is controlled.

Solution

Remove and discard affected leaves, then increase airflow and keep foliage dry by bottom-watering and avoiding overhead splashing. Allow the mix to dry thoroughly between waterings, and in persistent cases, apply a labeled copper-based or sulfur-based fungicide lightly to the foliage, following the product directions and avoiding use during very hot periods.

Basal stem rot

This disease starts at the soil line, where stems become soft, discolored, and water-soaked, leading to sudden collapse of the rosette even in otherwise dry-looking soil. Symptoms include a foul smell and black or brown mushy tissue at the base where the plant meets the potting mix.

Solution

At the earliest sign, unpot the plant, cut away all mushy tissue, and salvage any firm, healthy leaves or stem segments for propagation in fresh, sharply draining succulent mix. Discard the old soil, sterilize or replace the pot, reduce watering frequency, and ensure the plant receives strong light and a quick-drying mix as part of careful Adromischus cooperi care instructions.

Interesting Facts

Plover eggs mimicry

The mottled, dome-shaped leaves of this species closely resemble the speckled eggs of ground-nesting plovers, which is the origin of its common name plover eggs plant and helps it blend into stony habitats.

Localized South African endemic

This succulent is naturally restricted to parts of the Eastern Cape Province in South Africa, where it grows in rocky sandstone and quartzite outcrops rather than broad, widespread habitats.

Clonal mats from leaf bases

In its native habitat, plants often form small clumps as new shoots and roots emerge from the thickened leaf bases and short stems, allowing the colony to slowly spread between stones without long above-ground runners.

FAQs about Plover Eggs Plant

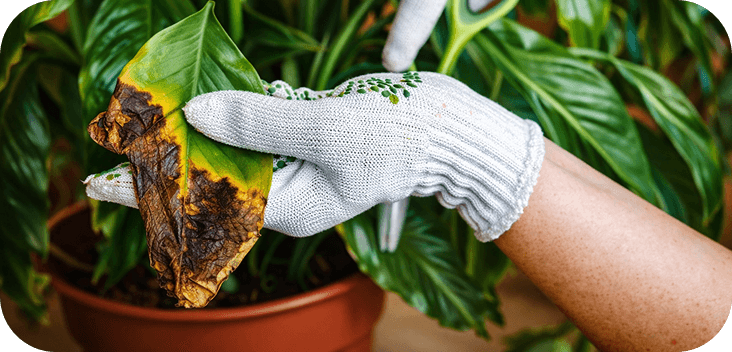
Brown patches or tips usually come from underwatering, very low humidity, or sudden temperature swings. Soft brown, mushy areas indicate rot from excess moisture around the roots. Remove damaged leaves and correct the underlying moisture or temperature problem.

Grow Healthy Plants with Botan Care

Keep your plants happy and healthy with plant identification, disease detection, and easy care guidance.
Botan plant care app — identify plants on mobile

Explore More Plants