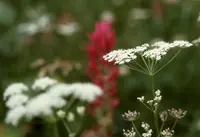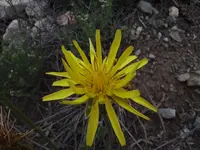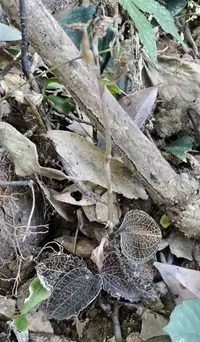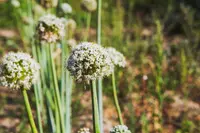

wild onion Care (Allium ascalonicum)

wild onion

About wild onion

Wild onion, Allium ascalonicum, is a small bulb-forming herb grown for its flavorful, onion-like leaves and bulbs. It belongs to the Allium group, which also includes onions and garlic.

Plants usually form narrow, hollow leaves and clusters of small bulbs, creating a clumping growth habit. They are often cultivated in home gardens and kitchen plots rather than found in the wild.

This species prefers well-drained soil, regular moisture, and a sunny, open position. It is generally easy to grow if the soil does not stay waterlogged.

Understanding how to care for wild onion helps maintain healthy bulbs and foliage and supports reliable growth from season to season.

Main Plant Requirements

Care Difficulty

Easy Care

Light Preference

Full Sun

Water Requirements

Moderate Water

Temperature Preference

Cool Climate

Hardiness Zone

4–9

Soil Texture

Sandy, Loamy, Organic-rich

Soil pH

Acidic (5.5–6.5), Slightly acidic (6.5–7.0)

Soil Drainage

Well-drained

Fertilization

Light (every 4–6 weeks)

Get Personalized Care Plan

Scan your plant to receive care tips personalized for your specific plant

Available on iOS and Android

How to Care for the wild onion

Allium ascalonicum produces best bulbs in stable, bright outdoor sun exposure.

  • Provide 6–8 hours of direct sun daily; full sun is preferred, especially in spring and early summer for strong bulb formation.
  • Tolerates light partial shade, such as 3–4 hours of morning sun plus bright open sky, but yields and flavor may be reduced.
  • In hot regions, protect from intense late-afternoon sun with light shade; too little light causes weak, floppy leaves, while extreme sun with dry soil scorches tips in wild onion beds.

Shallots prefer evenly moist but not saturated soil throughout active growth.

  • Water only when the top 3–5 cm of soil feels dry, then soak the root zone thoroughly while avoiding standing water around the bulbs.
  • Ensure loose, well-drained, sandy or loamy soil; soggy, compacted ground leads to bulb rot, pale yellowing leaves, and a sour smell from decay.
  • Reduce watering once tops begin to yellow and flop near harvest; very dry soil causes thin bulbs and limp leaves that recover slowly after irrigation.

Shallots need cool to mild temperatures for strong root and bulb development.

  • Ideal growing range is 60–75°F (16–24°C); growth slows noticeably below 50°F (10°C) or above 85°F (29°C).
  • Plants tolerate light frosts down to about 25°F (-4°C) once established, but repeated hard freezes below 20°F (-7°C) can damage bulbs without mulch.
  • In hot summers above 90°F (32°C), use mulch and consistent soil moisture to limit heat stress and prevent premature bulb splitting or early top dieback.

Humidity is rarely critical for shallot, which prefers the same relatively dry air as most homes and outdoor gardens.

  • Aim for 30–50% humidity, avoiding persistently damp, stagnant air around foliage.
  • Dry air is generally tolerated; problems arise more from excess moisture than from low humidity.
  • Watch for fungal spots or soft, collapsing leaves as signs of overly humid, poorly ventilated conditions, and improve airflow rather than misting.

Shallot benefits from loose, well-aerated, fast-draining soil to keep bulbs firm and healthy.

  • Use a sandy or loamy mix with moderate organic matter, such as garden loam blended with compost and coarse sand.
  • Ensure free drainage; heavy, compacted, or waterlogged soil encourages bulb rot and stunted growth.
  • Target a slightly acidic to neutral pH of 6.0–7.0, which supports nutrient uptake and balanced growth in Allium ascalonicum.
  • Improve aeration and structure by incorporating coarse sand or perlite, breaking up clods, and avoiding high-clay mixes.

This species grows reliably in containers when depth and drainage are managed carefully.

  • Choose a container at least 20–25 cm deep so bulbs can develop without crowding or deforming near the surface.
  • Select a rigid, heavier pot material if growing outdoors in windy sites to prevent tall foliage and flower stalks from tipping the container.
  • Elevate the pot slightly on feet or bricks so drainage holes stay clear and excess water escapes quickly after rain or watering, supporting wild onion indoor care.

Allium ascalonicum benefits from moderate feeding to support bulb and foliage growth.

  • Use a balanced 10-10-10 or 5-5-5 fertilizer or well-rotted compost on fertile soil before planting.
  • Apply a light dose of balanced NPK or slow-release granular fertilizer every 4–6 weeks during active growth.
  • Dilute liquid feeds to 1/2 strength to avoid excess nitrogen, which can reduce bulb quality.
  • Stop feeding wild onion 4–6 weeks before harvest and withhold fertilizer entirely during dormancy or winter.

Pruning Allium ascalonicum is simple and mainly focused on hygiene and directing energy to the bulbs.

  • In mid to late season, remove yellowing, diseased, or damaged leaves using clean, sharp scissors or snips.
  • Cut spent flower stalks at the base to maintain bulb size and prevent unwanted seed set.
  • Thin crowded shoots lightly at the clump edges to improve airflow and reduce foliar disease risk.
  • Avoid cutting healthy green foliage hard, as leaves are needed for photosynthesis and bulb filling.

Allium ascalonicum is usually grown in garden beds, with transplanting focused on spacing and bulb performance.

  • Transplant seedlings or sets in early spring once soil is workable and risk of severe frost has passed.
  • Move plants if bulbs are overcrowded, growth is weak, or soil has become compacted and poorly drained.
  • Lift clumps gently with a fork, keeping roots and basal plate intact, and replant at the same depth in loose soil.
  • Water well after transplanting, then keep soil evenly moist but not waterlogged to limit transplant shock.

Allium ascalonicum is commonly propagated vegetatively to maintain uniform bulb quality.

  • Divide bulb clusters in late summer or early fall after foliage has died back and bulbs have cured.
  • Gently separate individual bulbs or offsets, discarding any soft, moldy, or damaged material.
  • Replant healthy bulbs in well-drained soil, spacing 10–15 cm apart, with the tips just below the surface.
  • Seed propagation is possible but slow and variable, so use seed only for breeding or experimentation.

Allium ascalonicum is moderately cold hardy and usually needs only basic winter care in most temperate climates.

  • In regions with freezing winters, apply a 5–7 cm layer of straw or leaf mulch over the bed after the ground cools.
  • Avoid heavy, soggy soils in winter, as prolonged saturation around bulbs increases rot risk.
  • Move container-grown plants to a sheltered, frost-free but cool location to protect bulbs from deep freezing.

Care Tips

Staggered Planting

Plant small batches every 2–3 weeks in spring to early summer so bulb harvest is spread out and you can adjust spacing or depth based on how each earlier batch performs.

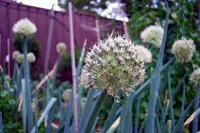
Leaf-Only Harvesting

If harvesting green tops, never remove more than 30–40% of the foliage from each plant so bulbs continue to size up rather than stalling or rotting.

Bulb Size Sorting

Sort sets or small bulbs by size before planting and group similar sizes in rows so plants grow more uniformly and you can time harvests more accurately.

Targeted Mulch Use

Apply a very thin, loose mulch layer (such as straw) between rows only, keeping it 3–5 cm away from bulb necks to suppress weeds without holding excess moisture around the stems.

Cure Before Storage

After lifting mature bulbs, cure them in a single layer in a dry, shaded, well-ventilated spot for 10–14 days until outer skins are papery and necks are fully dry, which greatly extends storage life when growing wild onion.

Common Pests and Diseases

Onion thrips

These insects rasp the leaf surface, causing silvery streaks, small white patches, and gradual leaf yellowing or collapse in dry weather.

Solution

Monitor foliage regularly and, at first signs, spray plants thoroughly with a strong stream of water to dislodge thrips, then apply insecticidal soap or neem oil to leaf bases and undersides; reduce nearby grassy weeds that host thrips and avoid overhead irrigation during the hottest part of the day to limit population spikes.

Onion maggot

This pest is the larval stage of a fly that feeds on bulbs and roots, causing wilting, stunting, and soft, rotting bulbs that pull up easily.

Solution

Use floating row covers from planting time to block egg‑laying adults, rotate crops so alliums are not grown in the same bed for at least 3–4 years, promptly remove and discard infested plants, and avoid leaving unburied onion debris that can support future generations.

Downy mildew

This disease causes pale, elongated lesions and fuzzy gray‑violet growth on leaves, which then yellow, collapse, and reduce bulb size.

Solution

Improve spacing and airflow, water at soil level in the morning to keep foliage dry, remove and destroy infected leaves, and in areas with a history of the disease use resistant or tolerant onion sets and apply a labeled copper‑based fungicide preventively during prolonged cool, humid periods as part of structured wild onion care instructions.

Neck rot

This disease typically appears in storage, where bulbs develop soft, sunken areas at the neck that become covered with gray fungal growth and may produce concentric rings.

Solution

Harvest only well‑matured bulbs with dry necks, cure them in a warm, dry, shaded place with good airflow for 10–14 days, discard any damaged bulbs before storage, and store healthy bulbs in a cool, dry, well‑ventilated area while rotating growing sites to reduce pathogen carryover.

Fusarium basal rot

This disease starts at the basal plate, leading to yellowing outer leaves, poor growth, and brown, dry decay at the bulb base that can progress upward.

Solution

Plant only healthy sets or seedlings, avoid planting in poorly drained or heavily infested soils, practice 3–4 year crop rotation away from alliums, and remove and destroy affected plants; in high‑risk beds, raised beds with well‑drained soil and careful avoidance of mechanical injury to roots and bulb bases reduce infection risk.

Interesting Facts

True shallot origin

This species is the classic cultivated shallot, believed to have originated in the region around present-day Israel and Syria, and later spread through the Eastern Mediterranean into Europe by trade and cultivation.

Vegetative cluster growth

Instead of forming a single bulb like common onion, it divides to form tight clusters of several smaller bulbs from one planted bulb, which allows growers to propagate it mainly by division rather than seed.

Milder, layered flavor

Its bulbs have a higher concentration of certain sulfur-containing compounds and sugars than common onion, giving a characteristic combination of mild pungency and sweetness that chefs value for sauces and vinaigrettes.
Botan icon

Did you know?

Historic records and linguistic evidence suggest that shallots were already distinct from common onions in ancient Mediterranean cuisines, and their name is linked to the ancient port city of Ascalon, from which they were exported widely in classical times.

FAQs about wild onion

Lack of flowers is usually due to insufficient light, very rich nitrogen fertilizer, or bulbs planted too shallow or crowded. Provide full sun, use balanced fertilizer sparingly, and divide congested clumps every few years to restore flowering.

Grow Healthy Plants with Botan Care

Keep your plants happy and healthy with plant identification, disease detection, and easy care guidance.
Botan plant care app — identify plants on mobile

Explore More Plants