

Amorphophallus bulbifer Care

Amorphophallus bulbifer

About Amorphophallus bulbifer

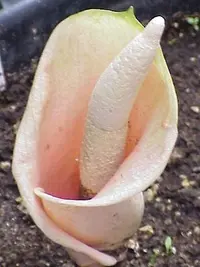
Amorphophallus bulbifer is a tropical tuberous plant in the arum family, grown mainly for its dramatic single leaf and unusual flowering structure. In the growing season it sends up a tall, mottled stalk topped with an umbrella-like leaf, giving it a striking, architectural look. The flower appears on a separate stalk and has a strong odor that attracts pollinating insects.

This species occurs naturally in parts of South and Southeast Asia, often in warm, humid forest understories. It is moderately challenging to grow because it has a marked dormant period when the tuber must stay dry and protected. Understanding this growth cycle is key to how to care for Amorphophallus bulbifer. It prefers bright, indirect light, evenly moist but not waterlogged soil, and good drainage.

Main Plant Requirements

Care Difficulty

Moderate Care

Light Preference

Partial Shade

Water Requirements

Keep Soil Moist

Temperature Preference

Tropical / Frost Sensitive

Hardiness Zone

9–11

Soil Texture

Loamy, Sandy, Organic-rich

Soil pH

Acidic (5.5–6.5), Slightly acidic (6.5–7.0)

Soil Drainage

Moist but well-drained

Fertilization

Moderate (every 2–4 weeks)

Get Personalized Care Plan

Scan your plant to receive care tips personalized for your specific plant

Available on iOS and Android

How to Care for the Amorphophallus bulbifer

This species prefers bright, indirect light that mimics dappled forest shade.

  • Provide 3–5 hours of soft morning sun with filtered or bright indirect light for the rest of the day, avoiding harsh midday and afternoon sun that can scorch the single large leaf.
  • Tolerates partial shade, but in very dim conditions the petiole stretches, the leaf plate reduces in size, and offset bulbils may form less abundantly.
  • Outdoors, site under high tree canopy or a shade cloth (30–50%) in summer; in cooler seasons, move to a slightly brighter position to compensate for shorter days.

Watering should support fast summer growth but protect the tuber from rot.

  • During active growth, water when the top 3–5 cm of soil feel dry, then soak thoroughly so excess drains away; soil should be evenly moist but never saturated around the tuber.
  • Use a loose, sharply draining mix so water does not pool around roots; signs of overwatering include yellowing, limp foliage and a sour smell from the potting mix or planting area.
  • As foliage yellows and dies back, gradually reduce watering, then keep the tuber almost dry in dormancy, giving only enough moisture to prevent complete desiccation in very dry conditions.

This tropical aroid grows best in warm, stable temperatures with a distinct dry dormancy period.

  • Ideal growing temperatures are 70–85°F (21–29°C); growth slows below about 65°F (18°C), especially in low light or wet soil.
  • Protect the dormant tuber from cold; avoid exposing Amorphophallus bulbifer to below 55°F (13°C), and never allow frost, which can irreversibly damage tissue.
  • In hotter periods above 90°F (32°C), provide extra shade and airflow; high heat combined with intense sun and wet soil increases stress and susceptibility to rot.

This species prefers moderate to moderately high humidity but usually adapts to typical indoor levels.

  • Aim for 50–70% humidity to support robust leaf growth and reduce stress during the active season.
  • It tolerates short periods of drier air, but prolonged <40% humidity can cause crisping leaf edges and drooping foliage.
  • Increase humidity with a nearby humidifier, grouping plants, or a wide pebble tray, avoiding misting the foliage heavily.

This tuberous aroid needs loose, airy soil that drains very quickly yet holds some moisture around the tuber.

  • Use a coarse mix such as 40% peat or coco coir, 30% compost, and 30% perlite or pumice to keep the substrate open.
  • Aim for slightly acidic to neutral pH, around 6.0–7.0, which supports nutrient uptake and healthy root development.
  • Position the tuber in a mix that feels crumbly, not sticky, so water drains within minutes and air can reach the roots.
  • Avoid heavy clay, compacted, or waterlogged substrates, which promote rot in Amorphophallus bulbifer tubers.

This species grows well in containers when the pot is sized and weighted for its tall, top-heavy leaf.

  • Choose a pot at least 2–3 times wider than the tuber so the thick roots can spread without circling tightly.
  • Use a deep container rather than a shallow one to anchor the tall pseudostem and prevent tipping in wind or bumps.
  • Prefer a heavier material like ceramic or clay to improve stability and reduce the risk of the pot toppling over.

This tuber responds well to moderate feeding during its active growth phase.

  • Use a balanced liquid fertilizer (around 10‑10‑10 or 20‑20‑20) at 1/2 strength every 2–4 weeks while the leaf is fully expanded.
  • Alternatively, apply a light top-dressing of compost or a mild slow-release fertilizer at the start of the growing season.
  • Ensure the potting mix is moist, not dry, before applying fertilizer to reduce root burn risk.
  • Stop feeding once foliage starts yellowing and the Amorphophallus bulbifer enters dormancy.

This species needs minimal pruning, as each tuber produces a single leaf or inflorescence.

  • Limit pruning to removing yellowing, dead, or diseased foliage at the end of the season using clean, sharp scissors or pruners.
  • Cut the spent flower stalk at the base once it collapses, leaving the tuber undisturbed in the soil.
  • Avoid cutting healthy green tissue, since photosynthesis in the single leaf supports tuber growth for the next season.
  • In outdoor group plantings, remove crowded or damaged leaves only if they impede airflow or harbor pests.

Container-grown plants benefit from occasional repotting to match the expanding tuber size.

  • Check for roots circling the pot drainage holes, bulging containers, or reduced leaf size as signs repotting is needed.
  • Repot dormant tubers in late winter or early spring, about every 1–2 years, before new shoots emerge.
  • Choose a pot 5–8 cm wider than the tuber, with good drainage, and replant in fresh, airy, well-drained mix.
  • Handle the tuber gently, keep roots slightly moist but not waterlogged after repotting, and avoid strong sun for 1–2 weeks to reduce stress.

This plant is most commonly propagated from bulbils and tuber division rather than from seed.

  • Collect bulbils that form on the leaf petiole of Amorphophallus bulbifer once they darken and detach easily, usually late season.
  • Plant bulbils shallowly in a well-drained, slightly moist mix in spring, keeping temperatures around 70–80°F for best sprouting.
  • Divide large dormant tubers in late winter, ensuring each section has at least one viable bud or growing point.
  • Allow cut tuber surfaces to dry and callus for 1–2 days, then pot and water lightly until new growth appears.

This species is not frost tolerant and needs protection in regions with cold winters.

  • In USDA zones below 9, lift tubers after foliage dies back, dry them, and store in a cool (50–60°F), dry, frost-free place.
  • For container plants, move pots indoors before night temperatures drop below 50°F and keep the soil almost dry.
  • In mild climates, leave tubers in the ground but mulch with 5–10 cm of dry material to insulate the root zone.
  • Do not water dormant stored tubers; resume light watering only when new growth appears in late winter or spring.

Care Tips

Tuber rest storage

After the foliage dies back, lift the tuber, brush off soil, and store it in a dry, airy tray at 60–70°F so it can rest without rotting before replanting in spring.

Bulbil propagation

Collect the small bulbils that form in leaf axils, dry them for 1–2 days, then pot them shallowly in a free-draining mix to build a stock of younger plants over several seasons.

Pot sizing strategy

Use a pot that is only 5–8 cm wider than the tuber each year to reduce excess wet medium and encourage strong, upright petiole growth rather than weak, stretched plants.

Support for tall petioles

Install a discreet stake or hoop at planting time and loosely tie the petiole once it elongates, which prevents wind or handling damage to the heavy umbrella-like leaf.

Preemptive pest checks

During active growth, inspect the undersides of the leaf and petiole grooves weekly for spider mites or aphids, and rinse with a firm stream of water at the first sign of pests to keep caring for Amorphophallus bulbifer low-intervention.

Common Pests and Diseases

Taro aphids

This pest often colonizes the undersides of leaves and young petioles, sucking sap and causing curling, distortion, and sticky honeydew that can lead to sooty mold.

Solution

Inspect emerging foliage regularly and hose off colonies with a strong but controlled stream of water, then remove heavily infested leaves. For persistent infestations, use an insecticidal soap or a light horticultural oil, repeating every 5–7 days while monitoring nearby aroids, since caring for Amorphophallus bulbifer often involves managing aphids on multiple plants in the area.

Rhizome soft rot

This disease affects the underground corm, causing it to soften, turn brown, and develop a foul smell, often leading to sudden collapse of the leaf during the growing season or failure to sprout.

Solution

Unpot the plant and cut away all soft, discolored tissue with a sterile knife, then dust healthy cut surfaces with sulfur or a copper-based fungicide and allow them to dry before replanting in a fresh, well-drained medium. Adjust watering so the corm is kept just slightly moist, never waterlogged, and keep temperatures warm with good air movement to slow pathogen growth.

Spider mites

These insects thrive in warm, dry indoor air and can cause fine stippling, dulling of the leaves, and delicate webbing between petiole and leaf blade.

Solution

Rinse foliage thoroughly with lukewarm water, including the leaf undersides, and increase humidity around the plant using a pebble tray or room humidifier. For ongoing problems, apply insecticidal soap or neem oil to both sides of the leaf every 5–7 days until new growth appears clean, and isolate the plant from other susceptible houseplants.

Leaf spot

This disease produces small water-soaked lesions that enlarge into brown or tan spots, sometimes with yellow halos, which can merge and cause partial leaf dieback.

Solution

Remove and discard affected leaves promptly and avoid overhead watering so foliage dries quickly. Provide good air circulation, keep the plant spaced away from other aroids, and if the problem persists, apply a labeled copper or chlorothalonil-based fungicide according to product directions during the active growing period.

Nematode damage

Symptoms include stunted growth, poorly developed foliage, and distorted or rotting areas on the corm caused by microscopic roundworms feeding on internal tissues.

Solution

Discard severely affected plants and do not reuse the contaminated soil, then choose only clean, firm corms from reliable sources for replanting. In future seasons, grow the plant in fresh, well-draining potting mix in containers, avoid garden beds with a history of nematode issues, and practice strict sanitation of pots and tools.

Interesting Facts

Unusual leaf production

This species produces a single large, umbrella-like leaf from each tuber, patterned with pale spots that help break up its outline in dappled forest light.

Bulbils along the leaf

Small bulb-like structures, called bulbils, form in the forks of the leaf veins and can drop off to form new plants, giving it an efficient vegetative reproduction strategy.

Cool-season Asian origin

It is native to higher-elevation, cooler regions of northeastern India and nearby areas, where it grows in seasonal forests and enters dormancy during the dry or cool season.
Botan icon

Did you know?

The inflorescence of this species can emit a mild carrion-like odor when receptive, attracting flies and beetles that act as pollinators, although the smell is usually far less intense than that of its larger relative Amorphophallus titanum.

FAQs about Amorphophallus bulbifer

Yellowing leaves often mean the plant is entering dormancy, which is normal after the growing season. Persistent yellowing during active growth may indicate overwatering, poor drainage, or nutrient depletion in the potting mix.

Grow Healthy Plants with Botan Care

Keep your plants happy and healthy with plant identification, disease detection, and easy care guidance.
Botan plant care app — identify plants on mobile

Explore More Plants