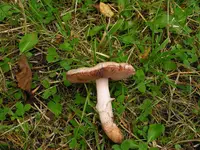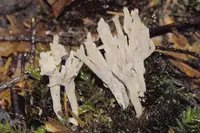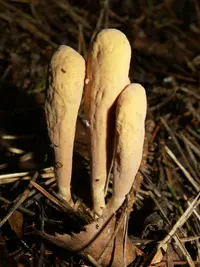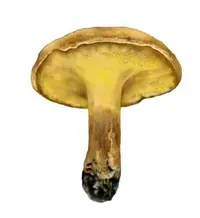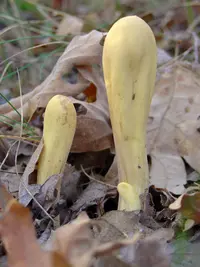
black morel Care (Morchella angusticeps)

Also known as: black-cap morel, Mel-15
black morel

About black morel

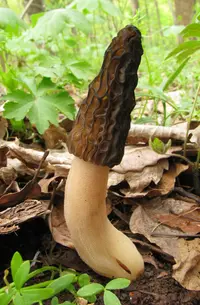
Black morel, Morchella angusticeps, is a wild edible fungus, not a leafy plant, valued for its distinctive honeycomb cap and rich flavor. It appears in spring, often in mixed hardwood forests, burn sites, and disturbed soils in North America.

This species grows from the ground rather than wood, with a hollow stem and cap that blend well into leaf litter. In nature it tends to fruit unpredictably, which makes cultivation challenging even for experienced growers.

For home growers, it is considered advanced, as it needs cool conditions, a specific soil environment, and the right microbial partners. Anyone wanting to learn how to care for black morel should understand that even ideal conditions do not guarantee regular fruiting.

Main Plant Requirements

Care Difficulty

Hard Care

Light Preference

Partial Shade

Water Requirements

Regular Water

Temperature Preference

Cool Climate

Hardiness Zone

4–7

Soil Texture

Loamy, Silty, Organic-rich

Soil pH

Acidic (5.5–6.5), Slightly acidic (6.5–7.0)

Soil Drainage

Moist but well-drained

Fertilization

Minimal (feed rarely)

Get Personalized Care Plan

Scan your plant to receive care tips personalized for your specific plant

Available on iOS and Android

How to Care for the black morel

Morchella angusticeps develops best in cool woodland light rather than open, direct sun.

  • Provide dappled or filtered light under deciduous trees, with about 2–4 hours of gentle morning sun and full shade by midafternoon.
  • Avoid strong afternoon sun, which can dry the soil surface and scorch delicate fruiting bodies of black morel, reducing yield and longevity.
  • In late winter to early spring, allow more exposure before trees fully leaf out; once the canopy closes, ensure consistent partial to full shade.

Morchella angusticeps requires evenly moist, never waterlogged, soil to support its underground mycelium.

  • Aim for soil that feels consistently moist 2–5 cm deep, allowing only the top 1–2 cm to dry slightly between natural rains or irrigations.
  • Use well‑drained, humus‑rich soil; persistent puddling, sour odor, or slimy white growths indicate overwatering and risk of rot.
  • During dry spring spells, supplement rainfall with light watering, while shriveling or brittle mushroom caps suggest the substrate is drying excessively.

This species fruits in cool spring conditions and declines when temperatures become too warm or too cold.

  • Optimal fruiting occurs around 50–60°F (10–16°C), with mycelium growth continuing from roughly 40–70°F (4–21°C) in moist soil.
  • Short dips to 32°F (0°C) may be tolerated in soil, but hard freezes and repeated frosts damage emerging mushrooms and reduce productivity.
  • Sustained heat above 75–80°F (24–27°C) quickly ends the fruiting period, so shaded, moisture‑retentive sites buffer against warm spring spells.

Morchella angusticeps requires very moist, cool air to form and maintain healthy fruiting bodies.

  • Aim for 85–95% humidity during active growth, using a humid tent, cold frame, or shaded outdoor setup.
  • Dry air causes caps to shrivel, crack, and stop expanding, often with pale, brittle edges.
  • Increase humidity with fine misting on surrounding surfaces, damp burlap, or a perforated plastic cover that still allows fresh air exchange.

Morchella angusticeps prefers loose, organic-rich, well-drained soil that mimics a forest floor.

  • Use a mix of 40% composted hardwood material, 40% loamy garden soil, and 20% coarse sand or small gravel for structure.
  • Target a slightly acidic to neutral pH around 6.0–7.0, avoiding strongly alkaline or heavily limed substrates.
  • Maintain high organic matter with leaf litter or woodchip mulch on top to support fungal feeding and mycelium spread.
  • Avoid compacted, waterlogged, or peat-only mixes, which limit aeration and can rot the mycelium.

This species is challenging but possible to grow in containers when conditions are controlled carefully.

  • Choose a wide, deep, non-glazed container to buffer temperature swings and hold a thick layered substrate profile.
  • Provide a drainage layer of coarse gravel under the substrate so excess water drains while the lower zone stays evenly moist.
  • Sink or partially bury outdoor containers in soil to stabilize temperature and moisture around the developing mycelium and fruiting bodies.

Morchella angusticeps is usually grown in nutrient-rich outdoor beds and needs only minimal fertilization.

  • Use well-aged leaf litter or light compost rather than high-salt synthetic fertilizers, which can harm fungal mycelium.
  • If soil is very poor, mix a small amount of balanced, slow-release organic fertilizer into the bed before the main growing season.
  • Avoid direct fertilizer contact with visible fungi; instead, amend soil around the colonized area and water in gently.
  • Do not feed during winter dormancy, and avoid strong or frequent applications that can disrupt the soil ecosystem.

Pruning Morchella angusticeps focuses on sanitary removal of spent fruiting bodies rather than shaping growth.

  • Harvest or cut morels at the base once caps are mature, using clean scissors or a sharp knife.
  • Remove decayed, moldy, or insect-damaged mushrooms promptly to limit disease spread in the bed.
  • Avoid disturbing or digging into the substrate, since the mycelium network under the soil provides future crops.
  • Do not trim or rake aggressively through colonized areas, which can reduce fruiting and long-term productivity.

Black morel cultivation is typically bed-based, so attention centers on careful site preparation and minimal disturbance.

  • Establish outdoor beds in early fall or early spring, when soil is cool and moisture is reliable.
  • Avoid transplanting colonized substrate once the mycelium has spread; disturbance often reduces or stops fruiting.
  • If container-grown, shift to a larger, well-drained box only when mycelium reaches the edges and growth slows.
  • Move substrate in intact blocks, keep it shaded and evenly moist, and handle gently to limit mycelial stress.

Morchella angusticeps propagation is specialized and usually done using spawn and prepared substrates rather than simple garden methods.

  • Obtain commercial morel spawn or culture rather than relying on wild spores, which are unreliable.
  • In early spring or fall, mix spawn into a blend of loamy soil, hardwood chips, and organic matter in a shaded bed.
  • Maintain cool temperatures, consistent moisture, and good drainage to support mycelium establishment and later fruiting.
  • Avoid frequent disturbance; allow at least 1–2 seasons for colonization and potential mushrooms to appear.

Established outdoor beds of Morchella angusticeps are generally cold hardy and need only light winter management.

  • In cold climates, apply a thin mulch of leaves or straw over the bed to buffer freeze–thaw cycles.
  • Keep mulch breathable; avoid heavy, waterlogged coverings that may cause rot in the substrate.
  • Container-based setups in very harsh climates can be overwintered in an unheated garage or shed to reduce extreme freezing.

Care Tips

Patch inoculation

Start a patch by mixing colonized hardwood-based morel spawn thoroughly into a moist, shaded bed of woodchips and well-decayed leaf litter, then cover with 2–3 cm of loose soil to protect the mycelium from drying out.

Spring moisture cue

About 2–3 weeks before expected fruiting in early spring, apply several light waterings to simulate snowmelt rather than one heavy soaking, which helps trigger uniform fruit body formation without waterlogging the bed.

Thermal monitoring

Use a simple soil thermometer inserted 5–8 cm deep and begin scouting for fruiting bodies when temperatures stabilize around 45–55°F, since timely harvesting depends on matching local soil temperatures rather than calendar dates.

Clean harvest technique

Harvest with a clean, sharp knife, cutting stems at soil level and avoiding disturbance of surrounding soil and mycelium, then gently brush off debris instead of washing, which preserves texture and shelf life.

Patch maintenance rotation

Each autumn, top-dress the production area with a thin layer of fresh hardwood leaf litter and fine woodchips, and every 3–4 years rest and relocate part of the bed to nearby suitable ground to keep growing black morel patches vigorous over time.

Common Pests and Diseases

Green mold

This disease appears as fast‑spreading green patches on the substrate or casing, often outgrowing morel mycelium and reducing fruiting. Symptoms include stalled or deformed black morel development in affected areas.

Solution

Remove and discard heavily contaminated substrate sections and any adjacent morels, then reduce surface moisture and improve air exchange to slow Trichoderma growth. Use strict hygiene for tools and containers, pasteurize or sterilize new substrate components, and avoid overwatering to prevent future outbreaks in Morchella angusticeps care.

Bacterial soft rot

This disease causes water‑soaked, slimy, and foul‑smelling tissues on developing or mature morels, especially in overly wet conditions. Symptoms include rapid collapse and liquefaction of caps and stems.

Solution

Promptly remove and discard all affected fruiting bodies and reduce surface moisture by improving drainage and ventilation. Avoid water pooling on morels, limit overhead misting, and disinfect tools and containers between batches to lower bacterial load in the growing area.

Fungus gnats

These insects are small, dark flies whose larvae feed on morel mycelium and young primordia in damp substrate. This pest can cause patchy, weak fruiting and tunnels or blemishes on stems and caps.

Solution

Use yellow sticky traps to monitor and reduce adult populations, and allow the substrate surface to dry slightly between mistings without letting it fully dry out. Cover vents or intake points with fine mesh, remove decaying organic debris, and, if pressure is high, use a biological control such as Bacillus thuringiensis israelensis (Bti) drenches targeted at larvae in the substrate.

Mite infestation

These pests are tiny arthropods that may graze on mycelium and fruiting bodies, leading to pitted, rough, or discolored morel surfaces. Symptoms include slowed colonization and reduced or misshapen black morel flushes in heavily infested trays or beds.

Solution

Discard severely infested cultures or trays and thoroughly clean and dry the growing environment before restarting a cycle. For mild issues, improve sanitation, reduce excess organic debris, and, where permitted, introduce predatory mites that feed on pest mites while keeping humidity and temperature within recommended ranges for growing black morel.

Interesting Facts

Eastern North America specialist

This black morel is native to eastern North America and is strongly associated with hardwood forests, especially stands of ash, tulip poplar, and sometimes apple, rather than coniferous woods where other morel species often dominate.

Cold-triggered fruiting

It typically fruits in early spring after a distinct period of winter chilling followed by soil warming, with the timing closely tied to local climate patterns and snowmelt rather than to a fixed calendar date.

Genetically distinct lineage

Modern DNA studies have confirmed that this species forms a separate genetic lineage within the black morel group, helping mycologists distinguish it from look-alike taxa that were once lumped under a single broad name.

Botan icon

Did you know?

This species often appears in the same general habitats year after year, indicating that the long-lived underground mycelium can persist in a site for many seasons even though the above-ground fruiting bodies are short-lived each spring.

FAQs about black morel

Yes, this fungus is edible but only when thoroughly cooked. Raw or undercooked specimens can cause gastrointestinal upset. Correct identification is critical, since some false morels are poisonous and can resemble it to inexperienced foragers.

Grow Healthy Plants with Botan Care

Keep your plants happy and healthy with plant identification, disease detection, and easy care guidance.
Botan plant care app — identify plants on mobile

Explore More Plants