dyer's madder Care (Rubia tinctorum)

Also known as: Madder
dyer's madder

About dyer's madder

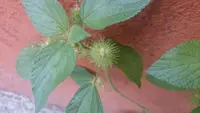
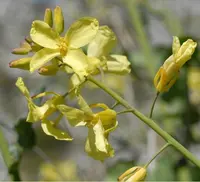
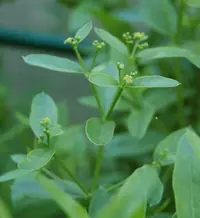
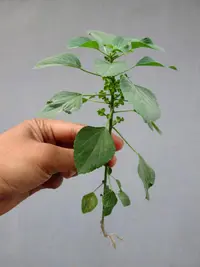
Dyer's madder, Rubia tinctorum, is a perennial herb grown mainly for its red dye-producing roots. It forms scrambling stems with whorled, rough-edged leaves and small yellowish flowers. Over time, it can create a loose, spreading clump or tangle that benefits from support or surrounding plants.

This species is native to parts of the Mediterranean and western Asia, where it grows in open, sunny spots and well-drained soils. It is generally hardy and not difficult to manage if given enough light and a soil that does not stay waterlogged. Gardeners who learn how to care for dyer's madder often grow it for both historic interest and natural dye projects.

Main Plant Requirements

Care Difficulty

Moderate Care

Light Preference

Full Sun

Water Requirements

Moderate Water

Temperature Preference

Cool Climate

Hardiness Zone

5–9

Soil Texture

Sandy, Loamy, Organic-rich

Soil pH

Slightly acidic (6.5–7.0), Neutral (7.0)

Soil Drainage

Well-drained

Fertilization

Minimal (feed rarely)

Get Personalized Care Plan

Scan your plant to receive care tips personalized for your specific plant

Available on iOS and Android

How to Care for the dyer's madder

Rubia tinctorum grows best in bright outdoor conditions with moderate direct sun each day.

  • Provide 4–6 hours of direct sun daily, ideally with morning sun and light afternoon shade to protect foliage from scorching.
  • Plant dyer's madder in a spot with full sun in cool climates, or very bright partial shade where summers are hot and dry.
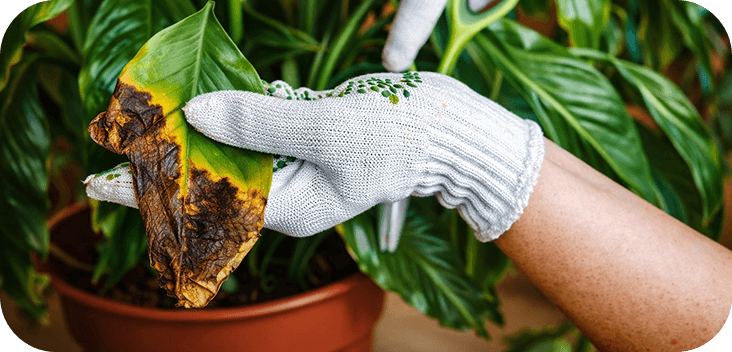
  • Watch for pale, leggy stems as a sign of insufficient light, and for crisp, browned leaf edges as a sign of excessive intense sun exposure.

Rubia tinctorum prefers evenly moist but not waterlogged soil, especially during the main growing season.

  • Water when the top 3–5 cm of soil feels dry, soaking the root zone deeply, then allow excess water to drain away.
  • In spring and summer, check soil more often; in cooler fall and winter conditions, extend intervals as growth slows and evaporation drops.
  • Use well-drained, loose soil to prevent root rot; yellowing, soft stems suggest overwatering, while wilting and dry, curling leaves indicate underwatering.

This perennial dye plant handles a range of outdoor temperatures but grows most actively in mild conditions.

  • Aim for 60–75°F (16–24°C) during active growth for strong roots and steady foliage development.
  • Established plants tolerate down to about 20°F (-6°C) with mulching, but repeated hard freezes below this can damage crowns and shallow roots.
  • In hot summers above 90°F (32°C), growth may slow; provide extra mulch and soil moisture to buffer heat and reduce stress.

Rubia tinctorum grows well in typical indoor humidity and rarely needs special humidity management.

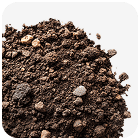
Rubia tinctorum prefers loose, well-drained mineral soils that allow its deep roots to develop and stay aerated.

  • Use a sandy or sandy-loam mix with 50–70% mineral content (garden soil or sand) plus 30–50% compost for moderate fertility.
  • Ensure fast drainage by avoiding heavy clay; add coarse sand or fine grit if the soil tends to stay wet after watering.
  • Keep soil slightly alkaline to neutral, around pH 7.0–8.0; add garden lime if soil tests acidic.
  • Avoid compacted, waterlogged sites, which restrict root growth and reduce pigment production in dyer's madder roots.

This species is suitable for container growing when the pot allows for deep, wide root development.

  • Choose a tall, heavy container to accommodate long roots and to prevent the vine-laden pot from tipping over in wind.
  • Use a fast-draining, sandy mix and elevate the pot on feet so drainage holes stay clear and water does not pool underneath.
  • Position the container where climbing or sprawling stems can be trained along a support, keeping weight distribution balanced around the pot.

Rubia tinctorum is a modest feeder but responds well to light nutrition during active growth.

  • Use a balanced liquid fertilizer (for example 10-10-10) diluted to 1/2 strength every 4–6 weeks in spring and summer.
  • Alternatively, mix in a thin layer of mature compost around the root zone in early spring.
  • For containers, a slow-release balanced fertilizer in spring can support growing dyer's madder for the season.
  • Stop feeding in fall and winter to avoid weak, soft growth during dormancy.

Pruning Rubia tinctorum is mainly done to manage spread and remove weak growth.

  • Cut back dead, damaged, or very thin stems in late winter or early spring before vigorous growth starts.
  • Shorten overly long or tangled runners to keep the patch compact and easier to harvest.
  • Thin crowded stems at the base to improve air flow and reduce disease risk.
  • Use clean, sharp hand pruners and make cuts just above a leaf node or branching point.

This plant is usually grown in beds, so focus on transplanting to maintain a healthy root system for dye production.

  • Transplant in early spring or early fall when temperatures are mild and soil is workable.
  • Move clumps when growth is weak, roots are densely matted, or soil has become exhausted after several years.
  • Lift plants with a fork, keeping as many roots as possible, and replant at the same depth in loose, well-drained soil.
  • Water thoroughly after transplanting and keep soil evenly moist for 1–2 weeks to limit root stress.

Rubia tinctorum is commonly propagated by seed and by division of mature clumps.

  • Sow seeds in spring in trays or directly in the ground, using a free-draining, lightly firmed substrate.
  • Provide bright light, consistent moisture, and moderate warmth around 65–75°F for germination.
  • Divide older plants in early spring, cutting clumps into sections each with several buds and healthy roots.
  • Replant divisions promptly, water well, and shade lightly for a few days to support establishment.

Established Rubia tinctorum is fairly cold hardy in temperate climates but benefits from simple winter preparation.

  • Tolerates light to moderate frost once mature, especially in well-drained soils.
  • Apply a 5–8 cm mulch of straw, leaves, or compost in late fall to insulate the root zone.
  • Cut back dead top growth after hard frosts; roots will resprout in spring.
  • Move container-grown plants into a cold but frost-free space or against a sheltered wall.

Care Tips

Install Root Barriers

Sink solid edging or a root barrier 25–30 cm deep around beds to keep the creeping roots contained and make future harvesting of dye-rich roots easier and more controlled.

Rotate Harvest Sections

Divide the patch into 2–3 zones and harvest mature roots from only one zone per year so plants in the other zones can rebuild strong root systems and maintain long-term productivity.

Use Vertical Netting

Provide sturdy netting or mesh panels 60–90 cm high for stems to scramble through, which keeps foliage off the ground, improves air flow, and reduces fungal issues in dense plantings.

Mulch For Clean Roots

Apply a 3–5 cm layer of straw or shredded bark mulch to reduce soil crusting and keep the topsoil friable, making it easier to lift clean, undamaged roots at harvest time.

Plan Bed Succession

Since caring for dyer's madder usually involves leaving plants in place for several years, dedicate a semi-permanent bed and avoid interplanting with crops that need frequent digging or division.

Common Pests and Diseases

Madder leaf beetle

This pest feeds on young leaves and shoots, creating irregular holes and sometimes skeletonizing foliage on established plants and seedlings.

Solution

Hand-pick adults and larvae into soapy water, especially in spring, and remove heavily infested stems; for larger plantings, use floating row covers over young plants and maintain weed control around beds to reduce overwintering sites.

Madder root knot nematodes

This pest causes swellings or galls on the roots, leading to stunted growth, weak stems, and poor dye root quality over time.

Solution

Remove and destroy severely affected plants and avoid replanting madder in the same soil for several years; use clean, certified planting stock, rotate with non-host crops like cereals, and incorporate organic matter to support beneficial soil organisms that suppress nematodes.

Powdery mildew

This disease shows as white, powdery patches on upper leaf surfaces and stems, often during warm, dry weather with poor air movement.

Solution

Remove and discard affected leaves, thin crowded growth to improve airflow, and water at soil level rather than over the foliage; if needed, apply a sulfur or potassium bicarbonate fungicide labeled for edible or herb crops, following label directions carefully.

Leaf spot

This disease produces small brown to dark purple spots on leaves that can merge into larger blotches, causing premature yellowing and leaf drop in dense plantings.

Solution

Cut off and dispose of heavily spotted foliage, avoid overhead watering, and keep plants spaced so leaves dry quickly; in recurrent cases, apply a copper-based fungicide early in the season and rotate madder beds to fresh ground to reduce inoculum levels.

Interesting Facts

Source of alizarin dye

This species was the primary historical source of the red dye alizarin, which is concentrated in its thick, fleshy roots and was used for textiles across Europe, Asia, and North Africa for many centuries.

Root color chemistry

The roots contain several anthraquinone pigments, such as alizarin and purpurin, whose relative amounts change with plant age and soil conditions, which alters the exact shade of red produced when the roots are processed.

Climbing, clinging stems

Its square, rough stems are covered with tiny backward-facing hooks that allow the plant to scramble over other vegetation and structures, helping it reach more light in its natural habitats.
Botan icon

Did you know?

Synthetic alizarin, first produced from coal tar in the late 19th century, rapidly displaced this plant from global dye production and caused a major decline in commercial cultivation, making traditional madder fields a historical rarity today.

FAQs about dyer's madder

This species spreads steadily through creeping roots and self-seeding, forming dense patches over time. It can become difficult to remove, so use root barriers, contained beds, or containers if garden space is limited or shared with delicate plants.

Grow Healthy Plants with Botan Care

Keep your plants happy and healthy with plant identification, disease detection, and easy care guidance.
Botan plant care app — identify plants on mobile

Explore More Plants