

English thyme Care (Thymus vulgaris)

Also known as: Common Thyme, English Thyme, Thyme
English thyme

About English thyme

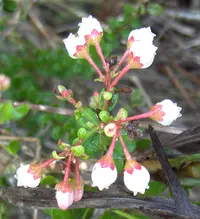
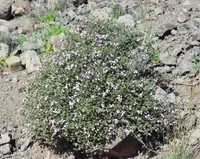
English thyme, Thymus vulgaris, is a small, woody, evergreen herb grown mainly for its aromatic leaves. It forms low, branching clumps with tiny, gray-green foliage and short flower spikes that attract pollinators.

This species is native to the Mediterranean region, where it evolved in sunny, dry, rocky habitats. As a result, it prefers plenty of light, well-drained soil, and moderate watering.

Its compact size, slow to moderate growth, and tolerance of pruning make it suitable for pots, herb gardens, and edging. These traits also make it relatively straightforward to care for English thyme when basic needs are met.

Main Plant Requirements

Care Difficulty

Easy Care

Light Preference

Full Sun

Water Requirements

Low Water

Temperature Preference

Cold Hardy

Hardiness Zone

4–9

Soil Texture

Sandy, Loamy, Rocky

Soil pH

Slightly acidic (6.5–7.0), Slightly alkaline (7.0–7.5)

Soil Drainage

Well-drained

Fertilization

Minimal (feed rarely)

Get Personalized Care Plan

Scan your plant to receive care tips personalized for your specific plant

Available on iOS and Android

How to Care for the English thyme

This sun-loving Mediterranean herb needs strong light to stay compact and flavorful.

  • Provide 6–8 hours of direct sun daily; full, unobstructed exposure suits English thyme in most temperate gardens.
  • Plant where it receives morning to early afternoon sun; light afternoon shade is helpful in very hot, dry climates to reduce leaf scorch.
  • In partial shade (3–4 hours sun), growth becomes looser and less aromatic; in winter, favor the sunniest south-facing spot to maintain vigor.

This drought-tolerant subshrub prefers infrequent, light watering over constant moisture.

  • Allow the top 3–5 cm of soil to dry before watering; in well-drained garden beds, this often means waiting until foliage just starts to lose perkiness.
  • Use sharply drained, sandy or rocky soil so excess water runs off quickly; standing water or heavy clay greatly increases root rot risk.
  • In cooler seasons and during prolonged rain, watering is rarely needed; overwatering shows as yellowing, limp stems, while crisp, browning tips indicate underwatering.

This hardy perennial tolerates a wide range of temperatures but grows best in moderate conditions.

  • Prime growth occurs around 65–75°F (18–24°C), with steady foliage production and strong aroma in this range.
  • Mature plants usually survive down to about 0°F (-18°C) in well-drained soil; in colder areas, mulch crowns lightly to buffer freeze–thaw cycles.
  • In hot summers above 90°F (32°C), growth slows; provide afternoon shade and avoid heat-reflecting surfaces that can bake roots and dry soil too quickly.

This species prefers dry to moderately dry air and rarely suffers from low humidity indoors.

  • Aim for 30–50% humidity; avoid placing English thyme near humidifiers or in steamy kitchens or bathrooms.
  • Crisp, browning leaf edges combined with constantly wet soil usually indicate rot or overwatering, not low humidity.
  • If air is extremely dry and hot, shield the plant from direct blasts from heaters rather than adding extra ambient moisture.

Thymus vulgaris prefers lean, mineral-rich, very well-drained soil that mimics dry, rocky habitats.

  • Use a mix of roughly 60–70% sandy or gritty material (coarse sand or fine gravel) with 30–40% general potting mix to keep the root zone open and fast-draining.
  • Aim for slightly alkaline to neutral pH around 6.8–7.8; add a small amount of horticultural lime if the mix is very acidic.
  • Improve aeration by blending in coarse perlite or pumice rather than fine peat, which compacts and holds excess water around roots.
  • Avoid heavy clay, peat-heavy, or constantly wet substrates, which promote root rot and reduce aromatic oil production.

This low, woody herb is very suitable for container growing when drainage and root space are managed carefully.

  • Choose a wide, shallow pot that matches the plant’s spreading habit so roots can colonize the surface layer without staying waterlogged in deep soil.
  • Select unglazed terracotta if possible, since its porous walls let moisture evaporate faster and help prevent soggy conditions around the woody crown.
  • Elevate the pot slightly on feet or spacers so drainage holes stay clear and excess water can leave quickly after rain or irrigation.

Thymus vulgaris needs only light feeding in reasonably fertile, well-drained soil.

  • Apply a light dressing of compost or a low-dose balanced NPK fertilizer once in early spring to support new growth.
  • Use a diluted liquid balanced fertilizer at 1/4–1/2 strength every 4–6 weeks in the growing season if container-grown.
  • Avoid high-nitrogen products, which reduce flavor and make stems weak and lush.
  • Stop feeding in late summer so plants harden off before winter; no fertilizer during dormancy.

Thymus vulgaris responds well to careful pruning that maintains a compact, leafy mound.

  • Best time is early to mid-spring, then light shaping after flowering if needed.
  • Remove dead, woody, damaged, or overcrowded stems, cutting back to green, leafy growth.
  • Use clean, sharp scissors or snips to take soft tips, encouraging bushier side shoots.
  • Avoid cutting into old, leafless wood, as new shoots are unlikely to emerge there.

Container-grown thyme benefits from occasional repotting or transplanting to refresh soil and manage root crowding.

  • Check for roots circling the pot, pushing through drainage holes, or noticeably slowed growth as signals to move it.
  • Plan to repot every 2–3 years in spring, using a gritty, well-drained mix and a pot only 2–5 cm wider.
  • Gently loosen the outer roots, trim any dead or blackened sections, and set the plant at the same soil level.
  • Water lightly after repotting, keep in bright but not harsh sun for a few days, and avoid heavy feeding until recovery.

Thymus vulgaris is commonly propagated to renew plants and expand a productive patch.

  • Take 5–8 cm softwood cuttings in late spring or early summer, then root them in moist, free-draining substrate under bright, indirect light.
  • Divide older clumps in early spring, ensuring each section has healthy roots and several green shoots.
  • Sow seeds on the surface of a sandy mix, keep at 65–75°F, and maintain light moisture until germination.
  • Use simple layering by pegging flexible stems onto soil, then sever and replant once rooted.

Established Thymus vulgaris is fairly cold hardy but benefits from simple winter precautions, especially in containers.

  • In the ground, apply a light, dry mulch around the root zone in late fall, keeping mulch off the stems.
  • In very cold or wet climates, improve drainage with raised beds or gravel to reduce root rot risk.
  • Move pots to a sheltered, unheated bright spot, such as a cold frame or cool windowsill, before hard freezes.

Care Tips

Encourage Bushy Growth

Pinch back soft stem tips every 3–4 weeks during active growth to keep plants compact, delay woody stems, and increase the number of usable sprigs.

Time Harvests Correctly

Harvest just before flowering on a dry morning, when essential oil levels are highest, and avoid taking more than 30% of the foliage at once so the plant can recover quickly.

Improve Airflow Around

Space plants so foliage does not touch and periodically thin crowded stems, which reduces humidity around leaves and helps prevent foliar diseases such as botrytis and powdery mildew.

Winterize Outdoor Plants

In cold climates, avoid heavy autumn pruning, apply a light, dry mulch around but not over the crowns after the ground cools, and brush mulch back in early spring to prevent crown rot.

Rotate Harvest Areas

When growing English thyme in larger beds, rotate which sections are harvested most heavily so individual plants are not repeatedly stripped, promoting longer plant lifespan and steadier yields.

Common Pests and Diseases

Spider mites

This pest feeds on tender foliage, causing tiny yellow stippling, dull leaves, and fine webbing between stems and leaves, especially in hot, dry conditions.

Solution

Rinse plants thoroughly with a firm stream of water, focusing on the undersides of leaves, then repeat every few days; increase humidity around plants slightly and improve air movement. If needed, apply insecticidal soap or a neem oil spray labeled for herbs, making sure to cover all leaf surfaces and repeating according to label directions.

Aphids

These insects cluster on new growth and stems, sucking sap and causing curling, distorted tips and sticky honeydew that can lead to sooty mold on English thyme.

Solution

Pinch or prune heavily infested shoot tips and dispose of them, then wash remaining stems with water to dislodge aphids. For persistent colonies, use insecticidal soap or a light neem oil spray, applying in the early morning or evening to avoid leaf burn and to protect pollinators.

Downy mildew

This disease appears in cool, humid conditions as yellow to tan patches on the upper leaf surface, with gray or purplish fuzz on the undersides, leading to leaf drop and reduced fragrance.

Solution

Remove and discard infected leaves and any fallen plant debris to reduce spore spread. Improve airflow by thinning crowded stems, avoid overhead watering, and water at the base in the morning; in severe cases, consider replacing the plant and rotating the planting area to reduce reinfection when growing English thyme.

Botrytis blight

This disease develops in prolonged damp conditions, causing soft, brown lesions on leaves and stems that quickly become covered in gray fuzzy mold, often starting in dense inner growth.

Solution

Promptly prune out and discard affected parts and any dead or decaying foliage around the plant. Reduce overhead watering, space plants to allow better airflow, and keep foliage as dry as possible; in very wet climates, growing in raised beds or containers with sharp drainage helps lower risk.

Root-knot nematodes

These microscopic worms attack roots, causing galls or swellings, stunted growth, poor vigor, and reduced essential oil content, especially in warm, sandy soils.

Solution

Remove and discard severely affected plants, including as many roots as possible, and avoid replanting thyme in the same spot for several years. Improve soil health with organic matter, use resistant or nematode-suppressive companion plants like marigolds in rotations, and consider growing thyme in clean, fresh potting mix in containers where nematodes are a known issue.

Interesting Facts

Natural insect deterrent

The essential oils in this species, especially thymol and carvacrol, make its foliage strongly aromatic and can help deter some herbivorous insects and browsing animals in the garden.

Mediterranean drought adaptation

This plant evolved on rocky, sun-exposed Mediterranean slopes and forms a dense, woody subshrub with small, narrow leaves that reduce water loss and allow it to survive long, dry summers.

Complex culinary aroma

Its chemical profile is rich in thymol, p-cymene, and linalool, which together create a flavor that stays stable under heat, making it one of the few herbs that can be added early in long-cooked dishes without losing intensity.
Botan icon

Did you know?

In ancient Greek culture, this species was associated with courage and sacrifice, and warriors were sometimes bathed in or anointed with its preparations before battle, while later in medieval Europe it was embroidered on knights’ garments as a symbolic plant of bravery.

FAQs about English thyme

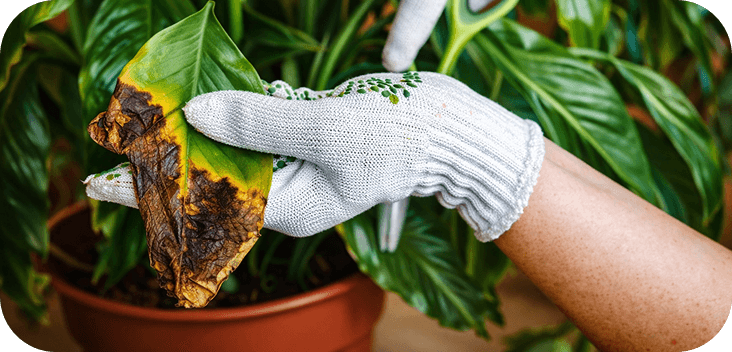
Brown leaves usually result from underwatering, excess heat, or root problems in compacted or waterlogged soil. Check soil moisture, improve drainage, and trim dead tips so new growth can replace damaged foliage over time.

Grow Healthy Plants with Botan Care

Keep your plants happy and healthy with plant identification, disease detection, and easy care guidance.

Botan plant care app — identify plants on mobile

Explore More Plants